Sunday, January 31, 2016

PC LOAD LETTER

Well, I didn't get any work done on the car this weekend - but there is something in the works for next weekend.

Side Note:

Also, a million apologies for my terrible editing. I'm sure there are plenty of grammatical errors and just words that disappear; I tend to type 'stream of consciousness' style and it really doesn't lend itself to easy reading sometimes.  So thanks for sticking it out, eh?


Fuel Pump problems

About half a tank to go, my fuel pump starts whining a bit louder than usual.   Well, inline pumps (pumps that are inline with the fuel line and NOT inside of the actual gas tank) do have the reputation of having a usually noticeable noise so maybe I was just extra sensitive to it.  I drove it for a day or two more.

Then, upon starting one morning, the pump was extremely loud and whiny.  I am talking to the point where the whine was bouncing off of buildings when I drove by.  It was embarrassingly loud.  I don't want my pump to be louder than my friggin' exhaust.  Yes, I drive a ratty muscle car but it is supposed to run well, not run like it looks.

After a bit of research, I found the issue - I'm starving the pump and it is dying out loud.

Basically, these EFI pumps can be thought of as gravity fed.  These pumps are better at 'blowing' than they are at 'sucking'.  So you don't want it working hard just to get fuel from the tank; My pump is about half way up between the top and bottom of the tank.  ...and when my fuel level was less than half full, the pump has to work extra hard to get that fuel, especially on a cold start.

Welp.

LESSON:  IF YOU GO WITH INLINE PUMP - MAKE SURE YOU CAN MOUNT IT AT THE BOTTOM OF THE TANK.

If you can't do that?  Either prepare your wallet for replacing it often or go with option B) In-tank fuel pump.

And it just so happens I know of a place that sells conversion kits! (Thanks Jacob, as usual)


There will be a bit more work to it but I'll save that for another weekend.

Anyway, I'm sure you're all wondering what the title is referring too, right?

PRINTER PROBLEMS


Our HP Photosmart 6510 printer decided that despite it being full of black ink, it didn't want to spit any out.  Super.  After hitting it, unplugging it and plugging it back in, running all the diagnostics programs on it and wasting all the rest of my colored ink, it was time to get dirty.

According to a few folks on the Internet/HP forums - they suspect that the printhead itself is clogged. They figured this out because it happened to them as well.

If I can take apart an engine and put it back together, you bet your *** I will attempt to do this to a stinkin' printer.

Here is a quick break from car stuff - enter, the Printer.


And here it is, our smug little HP Photosmart 6510 printer.  Now, don't get me wrong, I love this printer;  it prints high quality stuff and very quickly.  It can scan things.  Also, I can connect to it wirelessly and even have had the pleasure of other folks I don't even know print things from it, anonymously at 3:30am.  It's great.

(It is a great printer though, I just have...'luck' when it comes to these things.)

OK, the mission:


  1. Take it a part
  2. Locate print head
  3. Clean print head
  4. Attempt to put it back together
  5. Print stuff
Pull lid connector thingy until it suddenly gives, cutting a small chunk of your index finger out.

Get a Torx-10 driver and unscrew the outer layer screws.

Also - forget that there are still two more bolts under the display and make sure to tug at it for a few minutes even though nothing is obviously giving.

With those two bottom display screws out, take cover off.

There are sneaky ribbon cables that need to be minded and unhooked from the looming slots as you pull the thing off and put it to the side.

There is the printhead.  Take the ink cartridges out and set them aside.

There are two springs holding the thing down - take a screwdriver or something and just pop em off.

Be sure to catch the spring that you flung across the room and place it back so you don't lose it.

OK - the important part.  There are FOUR ribbon cables that slide into connector slots.  Take a pair of tweezers and disconnect them - they slide out of the connectors easily.


Here is the printhead!  Time to clean it.


Okay, so some people said they just used super hot water and soaked the bottom of the thing repeatedly.  I decided that since this was super important electronics, I'll be smarter than them and use rubbing alcohol and cotton swaps to clean it.  

I got a small sponge as well and soaked hot water through the black ink port as well.  I delicately cleaned as much as I could.


Boom!  Cleaned everything up.  Put it back together and fired it up.  Printed a test page aannnnndd...

NO BLACK INK STILL.

Alright, Fine then.  
I rage-took-apart the printer again but this time I just used super steaming hot water and soaked the bottom of the printhead, while repeatedly using hot water drips to soak the black ink port.  

After a bit of this, I put everything back together and....SUCCESS!

Mind the blue streaks, I was reusing paper at this point.

In short - don't bother being gentle, put the hot water to it and soak it!  Dry it up and put it all back together.  Run the cleanhead program once and you're ready to rumble.

Also, wear latex gloves or something, my fingers looked like I got in a fight with a clown.


Alright, enough of the printer stuff - hopefully next week I'll have some car stuff instead.

Until then.

Sunday, January 24, 2016

Roar of the Beast

Man, one thing I've always kind have known about working on classic cars but really understand now that I have been working on the Beast is this:

They always keep you on your toes.   

There is always something.  But that is honestly half the fun in my opinion.

Proper bed attire


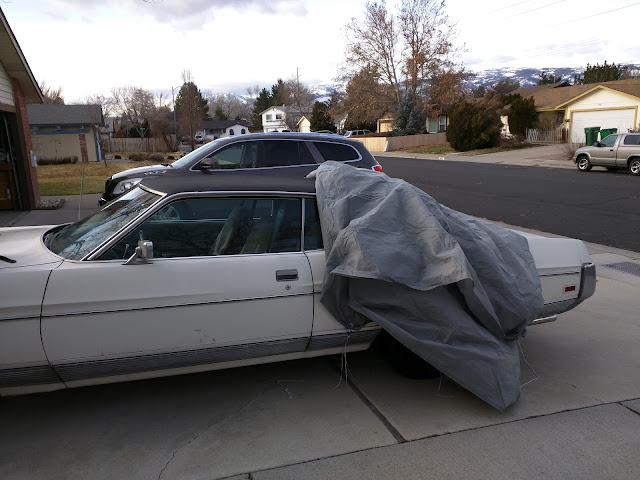
Since the Beast came home with me,  I finally got her a cover to shield her from the rain and freezing temperatures Reno is prone too.  It is your standard 4-layer cover,  tie-down holes on each side of the car; front,back,passenger and drive side.  Just enough protection to prevent water from getting in the car and such.

While we were at the store, I decided I needed to get some of those clips/carabiners so all I have to do is just 'clip' the ropes on instead of tying an extravagant knot every time.

You know, these things!


Well of course, the store I was at didn't have those types.  All I could find were a party package of these:


Yep, that is literally shaped like a guitar.  Welp, what did I expect when it was probably next to the party napkins and the leaky keychain squirt guns?

Well, you know the drill: of course I got it because I don't want to go hunt proper ones down and I'm SURE this will work out for me just fine, right guys?

Right?

Are you guys getting a feel of my selective laziness/impatience?  I have a lot of "whatever, it will work fine" moments.

Anyway,  the cover fits...


And there is our stupid guitar carabiner doing its job.  It just took a bit of finagling to route it on there but it isn't like I'll need to rip this off in a hurry or anything.   *cough*

Also, this:


My antenna doesn't retract and I'm not sure I want to commit and poke a hole through the cover just yet.   "Whatever, it will work fine."

Rude Awakening


Fortunately, this isn't in the metaphorical sense, but in the very literal sense.  

I wake up slowly to what sounds like a horn going full blast outside.  My wife wakes up at the same time.  It's 5 in the morning.

"Is that the Beast?"


Now, all guys like to think they are this in a panic-wake-up situation:


Nope!  More like:


Pajama pants half on, ended up throwing the shirt across the room, for some reason, flicking on all lights as I run out to the garage and open the door.

Yep, it's the Beast, at full tilt/roar at 5 in the morning. I'm sure my neighbors love me by now. "Crap crap crap crap!!!"
One thought is going through my brain at this moment: The horn switch is stuck; gotta get to the battery and just quickly pull the quick-disconnect.

Well, in order to do that, I have to pull the car cover up over the hood.  

And in order to do that, I have to solve the Rubik's cube of a maze-puzzle by routing that stupid carabiner through the grommet hole in a very specific fashion to get it to come out.  Let's just say finesse isn't my strong point when I'm 'full turbo'.

Welp, full adrenaline, still half asleep and lack of coordination made that whole attempt unsuccessful to an extreme degree.    I rage quit that and ran into the garage to grab wire cutters; I'll just cut the rope.   

Guess who didn't put his wire cutters away last?  ----> This guy <-------

Fortunately, my brain decided to engage another 1% and I found a 'good enough substitute' on the wall next to it.  I manage to cut the rope on the cover free, rip it back, access under the hood and disconnect the battery.

Silence fills the neighborhood street again and my heart decides to back off from mach one.

Things I learned:

  • When I'm full turbo and half asleep: I revert to cave-man like status by grunting,  yelling and banging on things until something happens.
  • Under full adrenaline, my hands turn into giant blocks of clumsy dumb wood.
  • I can't properly dress myself in a hurry.
  • I do however get **** taken care of,  just don't expect it to be pretty.
  • GET A NORMAL CARABINER.
  • The horn on the Beast is actually decently loud. 

Aftermath


Well, I ended up just disconnecting the horn switch for now.  When I get to it Sunday or next Friday, I'll inspect it further and find a solution.  Until then,  the Beast will be a mute.

Oh and the next day, 
Reno decided to do it's weekly "hurricane winds" during the night.  Guess who didn't properly go back and secure the ropes on the car cover?


Sweet car parachute, bro.

Other stuff


In other non-panic related news, I did other things this Friday to the Beast.

I made a proper cork gasket for the air cleaner assembly. Before, the air cleaner neck was a bit uneven after our modifications and sitting clean on the metal gasket we made for it.


So above you see the bottom of the air cleaner assembly.  That ring you see is the metal gasket - I want to make a nice cork style gasket so it can sink down into it, making a nice air seal so air goes in through the air cleaner, not through the sides.


Boom!  Bought some 1/8" cork from O'Reilly's Auto, cut out a ring and slapped it on the throttle body.


The Air cleaner sat nice and snug once it was tightened down.  Though this caused some interference with the hood when I tried to close it.  This is due to the scoop coming forward a bit now that it was sitting properly on the throttle body.    No problem!


A bit of widening the corners out and it fit perfectly afterwards.

Making her quiet


At least taking some of the exhaust resonance down - I purchased some cheap sound deadener from Amazon.  


Time to do a bit of cleaning...


I had to grind down some of the rust - but after I did that, I slapped a few strips all round the area.  

Forgot to take pictures of my handy work - but I should have some next week when I lay down some more.


Anyway, that's enough fun for now; hopefully this next week will be a bit more...  quiet.

Until then!

Sunday, January 17, 2016

What a scoop!

Here's the scoop; This pun is stupid.  But it's time to put a scoop on the Beast.

Recap:


In our last episode of "I have no idea what I'm doing - but it's awesome", we just finished the exhaust, hooking the EFI up and finally firing it up for the first time.

We discovered that all of our air cleaner solutions just wouldn't be adequate enough (well, more so just clearing under the hood) so finally I had an excuse to move forward with the hood scoop route.

The Real Scoop

After some researching, Jacob sends me this in chat: Shaker Scoop.
Factory reproduction of the old Mustang shaker scoops.  These things you would see on 1970's Boss Mustangs.  Well, after giving it enough thought (by just checking if I had enough money still budgeted in my LTD category), I pulled the trigger.

Things I did not give any thought too:
  • Actual hood clearance
  • clearance above the throttle body
  • Filter size vs engine needs
  • My sanity
Spoiler alert: They were all problems.

So here it is!  Summit had it in stock so I was able to snag one immediately, ensuring I would have zero time to back out of this idea.


Sweet.


I love the Autolite sticker on there....


Pretty cool!
It comes in several pieces: the actual scoop part that sticks through the hood, the gasket/rain catcher with drain hose, cleaner assembly top where the scoop bolts down onto, bottom cleaner assembly that sits on the throttle body and of course, the air cleaner filter...the tiny, tiny air cleaner filter.

The air cleaner assembly is actually all fiberglass and the the top didn't have any bolt/drill holes - so I would have to do that when assembling everything together.

Making room for the scoop

First, we cut an initial hole to see how and where things lined up.  We noticed right away that the scoop base came up too high and wouldn't clear the hood even after the hood was cut - but more on that later.  Let's finish this part.

To get proper measurements,  I taped off the hood down the middle, and down the two creases in the hood on each side.  I then used a 90 degree ruler to make actual 90 degree angles in front and behind the initial cut.


Now that we have a proper center, we placed the scoop top down onto the hood where it would be if the hood was shut and everything was together.   I drew an outline around the scoop's bottom.  Using that as a guide, I drew a line about 1" away from that - that is where we want our general cutout to be.


Jim cut out a wooden template based on that sketch; we will use that so we can use the plasma torch to cut the hole into the hood.

(Author's note: I will be going back and forth between past/present tense because I'm terrible at actual writing composition.)

We actually screwed the wooden template into the hood.


Then, we ground(grinded?) the paint off around the wooden cutout so the plasma can complete the circuit on the car.


Now it is ready for the plasma!  And you thought Uncle Jimbo's garage only did exhaust!


I hid behind a pillar while Jim made sparks fly with the Beast.


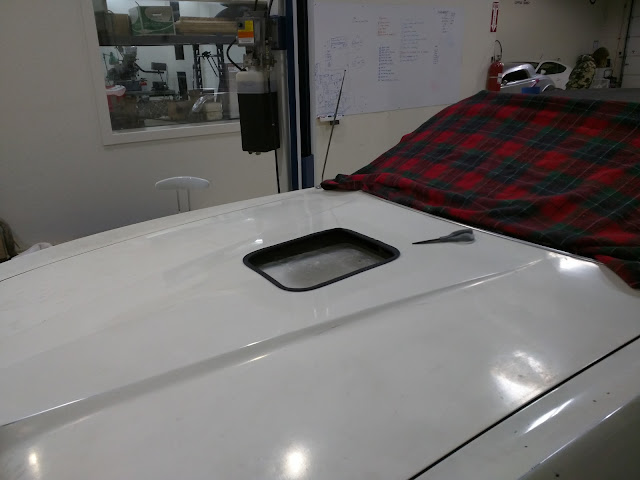
Boom. A hole has been made.

So at this point, all of our clearance issues have been solved, and everything fits fine (yep yep, I'll get to how we got around all that below - let's finish this part up first dangit)

Time to get it ready for some paint touch-up.  This part is where Jim taught "me how to fish" here because I had no idea what a "DA" (Dual Action) was until this point.  I'll sum it up with pictures and captions.

Prep for primer; even out the high spots in the current paint and old primer.

Action shot courtesy of Jim.


"Like a topo-map!"  

Now that it was evened out - I applied primer evenly around our affected area. Several coats will do ya!


A guy at O'Reilly's told me that a place called "Reno Brake" does paint matching in a rattle can - so I took a piece of the hood down to them; a half a day later, I had two rattle cans ready to rumble!

Technically, the car is Wimpleton White, 9A - but that is what a few decades of wear will give ya.

After a day, the primer is ready to be evened out to ensure a nice, flat and even application.  Pretend there are a lot of pictures of me doing this right here.

After the primer was attacked - time to paint!

That horse on the white board back there was judging my technique. 


Thanks to Jim's basically teaching me how to paint - we get a few coats on.   Once everything was dry, we hit it with the 1000 to take off all the dry paint specs and to blend the new and old paint a bit.


The paint matched decently well.  If I took the time to actually buff the piece I gave them, it would probably match closer.  (This is where Jake says "I told you so")  It was still a bit darker in the end but honestly, if you look at the hood as a whole, there are many other actual paint issues and the scoop portion ends up looking like best part.


After the painting part was done, I needed to cover those edges up with some rubber trim.  I made sure to measure the thickness of the hood before all that painting fun and had some rubber trim I found on ebay delivered to soon after.


Once the trim arrived, I put it on and completely lucked out; it fit perfectly!


Nice!

Okay okay, let's get to what we had to do to get things to fit.

IT DOESN'T FIT!

Here was why:
  • The throttle cable connection levers on the throttle body didn't clear the air cleaner assembly.
  • The base was too high - the hood wouldn't be able to close properly on the base of the scoop assembly.
  • The air cleaner filter was only 2" - that is too small.  (I have math for this!)

Throttle Body Linkage Fun

First, let's fix this clearance with the throttle body linkage.  The thing below (circled) would catch on the air cleaner assembly, preventing it from opening all the way.  


So we took the death wheel out and just made it shorter!


See above?  Now the top part of the linkage will easily clear underneath the air cleaner assembly.  If I for some reason need that, it is standard holley carb linkage, I can easily replace it.

Easy peezey - next up, actual hood clearance.

Hood Clearance

After a bit of measuring, we found that we could safely cut the bottom neck out by about half an inch.  So Jim took it to the mill.

I can see some of you cringing already; stop that.  It didn't chip and it cut nicely believe it or not.  


And guess what?  It lowered it enough for the hood to close over the base with no problems.

Okay, there was a problem but we actually anticipated it; the neck obviously gets wider as it gets closer to the base of the assembly.  So naturally, when we cut it, the base is now too wide and doesn't sit properly on the throttle body.

Solution:  cut out a metal gasket that will fit on the throttle body but is wide enough for the air cleaner to sit on!

I took measurements of the diameter the throttle body neck and what the assembly's new neck diameter is now.


Armed with that, Jim designed a new fitting in CAD.  Then, with the Torchmate (think CAD, metal cutting awesome machine), he cut out a the fitting.

[NOT PICTURED: that actual metal fitting/gasket - because of course not]

Air Filter MADNESS

Dear lord this was a mess.

So the air filter was too small, right?  The 3" one from my original setup was too large to fit in the assembly.  The gents suggested maybe I checkout the those filter tops which are actual filters instead of just chrome toppers.  PERFECT - so I got a cheapo one off of eBay immediately without really doing any research on the subject.  Per usual.


It arrives.  Holy hell, the thing is like 3/4" thick!!!  When I put the thing on, it actually raises the filter height to 2.5" - effectively blocking off all air flow to the rest of the air filter.  

Old one.

New one.  DUMB!

I was at a crossroads here;  do I leave the new top on it, and hope that I get enough air flow through that? or do I go with the 2" filter?

WHAT DO I DO, I -Wait...I can use MATH to solve this, kiddos!!!

First off; with this handy magic equation that some marketing chump engine expert came up with, my engine needs this much air flow area:
  A = (C.I.D. x RPM) / 25,500) = (466x4900)/25500 = 89.54"

Kay - so with the 2" filter with chrome top - I need the SA of a cylinder. Well, the lateral surface area anyway, because the top will be blocked off:

A=2πrh=2π(6")(2")=75.4"

CONFIRMED:  2" IS TOO SMALL, GUYS
Heh

What about the top only?  With this, let's do area of a circle: 

A = π r^2 = π (6)^2 = 113.1"!!!

Perfect!  That's more than enough.

"Hey, Jake, I'm so smart - check this out!"
(Jake flips the top over to reveal this)

"I'll bet that blocks 40% or something of that air flow..."

Well, ****.  Not to mention that 1/2" border with ZERO air flow as well...well now what?

Then I realized something....Go back up - noticed I put in 6" for the radius?  I'm dumb - the diameter is 14" - so the radius should be freakin' 7", not 6", which brings up the area to 87.96".  and If I get a filter that is 2.1 or so inches, that should bring me over the amount I need.  And guess what, it does and I got one from Summit for 16 bucks.

92.36" > 89.54" which means the engine will breathe!

Yay! Now let's put it all together!

It all comes together

Of course I lost ALL the attachment bolts.  They all disappeared.  I'm sure they are at the bottom of a box somewhere, in the trash or in my pockets - or in the left sock that always disappears after a wash. Whatever.

I did a quick measure, found some bolts/nuts and cut em to size.


and.......


GUYS.


Wait wait - I had to tighten my headers apparently because I don't know how to tighten ANYTHING down properly apparently...okay, exhaust leaks taken care of.  LET'S DRIVE THIS THING!

We took it for a test run....


Throttle response a MILLION percent times improved.  Also, it is a new car now; I feel like I just unleashed so much more power.  Hell, if I romp on the pedal more than 1/4 of the way, I lay down rubber.


The Beast is back home. Welcome back!

Prologue:

I guess now the next step is to make it two-legged with some bigger tires so it can finally hook.  Let's save that for the next winter though; I need to enjoy the car for a bit not to mention save up for all this stuff.

There is still plenty of small things to do in the meantime as well, but at least I can 'keep 'er driving' while I take of those things.

Of course, a huge thanks to Jim and Jake for all the fabrication/paint/moral support.

I know I have some family reading this as well; I still have more to do on the car but I'll also have some pictures of Jake's 427 Ford racing engine he will be putting in his 73 Cougar.  Should be pretty neat!

[Insert some proper sign off here]