It has been forever hasn't it. Well, I only get Friday's to do car work so trust me, it feels like it has been forever.
Well, two (three?) Sundays later and now there is an update. Last I left off, I was being paranoid about my inline pump doing too much sucking and it started whining so loudly, it was embarrassing me at intersections. I was also worried that due to the pump over working, it was going to leave me stranded somewhere.
So, I opted to buy an "in-tank" assembly from Tanks Inc. With some fabrication help from my two partners in crime, the Beast will be back in business.
This was a supposed to be a one-two Friday job, but of course stuff has to happen, doesn't it? [Welcome to working on hotrods]; a buddy of mine will continue to remind me, just in case I forgot about the wonders of classic cars. And he is right; I should be used to this by now. And I am.
Anyway, let's take it from the top.
The Game Plan
- Drain 20+ gallons of fuel from tank
- Drop the tank
- Drill hole into tank
- Assemble in-tank assembly
- Un-drop the tank. (put its guts back up there)
- Hook everything up
- DRIVE IT
Let's get started!
Drain it
Jacob provided me with four 5-gallon jugs. So now it was time to siphon the gas out. As much as I like the smell of gasoline (Yeah I'm a weirdo), I don't want to huff nor drink it. So let's use the existing fuel pump to do the hard work.
About 20 gallons later, the tank was virtually empty.
Tank Time
So dropping the tank is always a bit of a PITA; I have to take off the panhard bar, push/pull exhaust, get dirt everywhere, yell, etc. But it comes out eventually.
Once it was out, we got the remaining fuel out of it. Next step? Drill a big hole at the top, this is where the new pump will go. But first, we had to get all the nasty gas fumes out. We took a hose to the tank and basically filled the thing.
Once we deemed it was safe to drill, Jacob did the drilling. Because he is a cool.
Trust me, it looks like a lot of gas, but it was just residual. I PROMISE.
Once the hole was made, we measured how deep the tank is. The in-tank assembly we got will not be long enough to reach the bottom of the tank, so we (I mean Jacob) will have to weld on an extension.
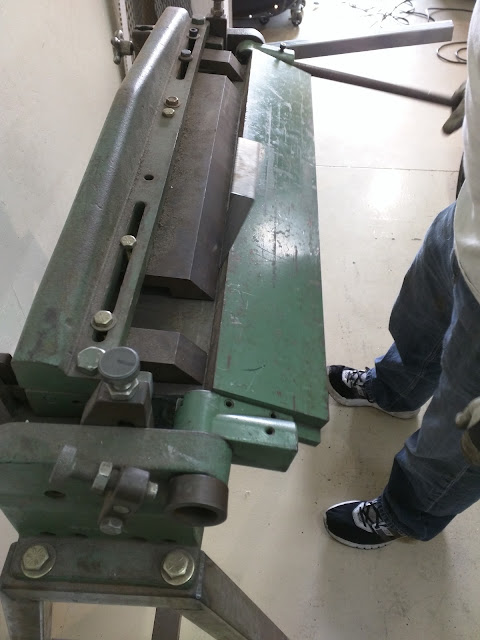
Once we had the tank measured, we measured the length of the in-tank assembly piece. Armed with that, Jacob made a 3" extension out of similar width sheet metal.
Using the plasma torch, he cut out a piece.
And Boom! The above matched pretty well, so after a bit of grinding and touch up, Jacob welded it together.
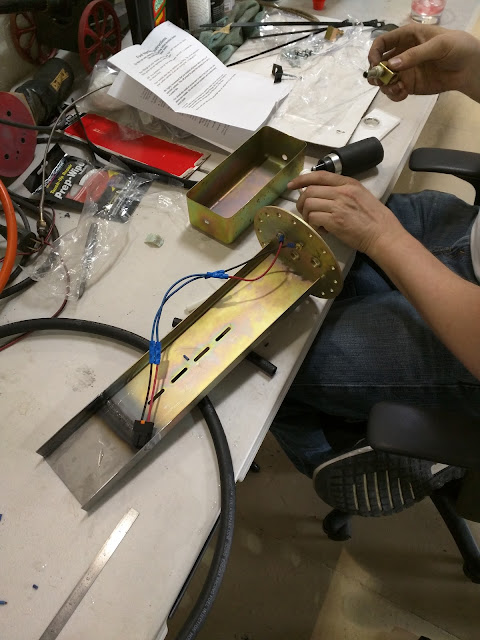
Since we extended it, I had to extend the existing wiring. I crimped a 3" extension for the lead/ground wires.
And with the wires, outlet, return line and vent line assemblies in place, boom, the in-tank fuel pump is ready to rumble. Now to prep the tank.
The Tanks Inc assembly comes with pretty straight forward directions; use the bottom ring to stencil drilling holes first, then clean the metal shavings from the top and bottom. Weld the lower ring on the bottom side of the hole, use gasket sealer everywhere, place the the cork gasket down on top, then place the assembly inside the tank and bolt everything up!
We got the holes drilled.
But here is where we ran into our first problem; the holes weren't big enough and nor centered perfectly. Now even though the tank metal is pretty thin and malleable, the screws that came with the assembly are even worse. We stripped/broke off 3 of them immediately. Hell.
Jacob got the bits out and I re-tapped the threads. Home Depot run for more screws.
Of course the screws I got were sheet metal screws and not machine screws. Because I'm a newbie and have to make this mistake once. So ANOTHER run to Home Depot and now I have plenty of replacements.
We re-drilled the holes to be a bit bigger this time and I filed any of the holes that were suspect just in case. After testing the screws, everything fit just fine so that means it is time to put everything together.
Before we can seal everything up, I needed to get all the metal shavings out from the fabrication work. To do this, a half gallon of WD40, a magnet and some swishin' will help this.
I got a pull magnet from Home Depot but it really only works well from one side. So I propped the magnet up with the tank's lock ring I took out earlier.
Which seemed to do the trick perfectly. A bit of sloshing the WD40 from side to side and the magnet did the rest.
A bit of ARP thread sealer, Edelbrock gasket sealer, and gentle torquing with the screwdriver/nutdriver, the assembly is in and sealed up!
The next part was a bit more of a puzzle.
Putting it all together
This part was a bit of the pain. So when tank goes all the way back up I wasn't sure of the kind of clearance I had. Here is a hint, I had zero clearance. To prove that, I drilled an access hole from the trunk, right above where the tank will sit. A hole that, yes, I will close up later on, but for now, will serve as a vital, 'how is it all coming together' portal.
Also, a completely useless thing I did was drill through that cross beam. A great idea at the time; I wanted to have the outlet/feed go directly from the outlet to the fuel line. Little did I know that once the tank is all the way up, the lip of the tank literally pinches off that line....more on that later.
Alright, we got the vent line hooked up and the outlet, fuel line hooked up. I sealed off the return line because I will use the existing one I already plumbed in.
There is that useless hole I drilled. I was so proud of the perfect fit, the grommet and everything too.
A view from the top.
And then I raised the tank up. Tightend all the hoses, Put the panhard bar back, Got everything in place.
Um, wow, I really don't have any room, do I? Look at that picture. Everything is nice and snug down there. What I didn't notice yet was the fuel line being completely pinched off. But that won't mater in a bit because there wouldn't be any damn fuel being pumped through it anyway...
So, I get voltage going and prime the pump; nothing. No noise. I hear the clicking of the fuel injectors attempting to prime the engine but no fuel pump noise.
Damn.
Jim verifies we are getting 12v on the wire to the pump but the pump isn't making a sound. Dead Pump? Bad wiring? What did I break? *sigh*
Either way, the pump has to come out.
-- Fast Forward yet another week --
Try #3
Welp, time to disconnect everything - the goal now was to see how low I can get the tank without dropping it. Then cut an even BIGGER access hole - pull the pump out of the tank without dropping it. Or blowing myself up in the process.
I propped up the tank with the hydraulic jack and completely undid the gas tank straps. The tank peacefully sunk down onto the jack. Then, I lowered the jack about 6"...this should be enough to cut a bigger...access port.
[Insert Jim with the plasma here]
No fires. No kabooms. Just a nice little hatch with perfect access to the tank.
That hole would be the perfect amount of space to pull the pump clean out.
I used the air tool to clear the area of dust and debris and got the pump out without too much issue. Before the area filled up with gas vapors, I found a carb lid that fit the hole perfect; weighed it down with the floor jack just to make sure we don't have any fire danger.
Perfect; that's up to fire code, right??
So what about the pump?
Sigh. "There's your problem!" My AMAZING crimp job sucks and when I placed the assembly in the first time, I must have caught the wiring and pulled it right out.
LESSON: CHECK YOUR CRIMP JOB. Pull, tug, make sure everything is in there snug.
Let's fix that.
Much better. I did the ol' pull test on all of them just to make sure; we're good to go. I put the pump assembly back in. But before raising the tank, I then realized I was pinching the fuel hose, so it was time to reroute it properly.
In the picture above, you'll see the fuel hose going through that cross beam. Right below it is the lip of the gas tank. When the gas tank raises to its final position, that lip will be pinching into the hose about half way at least.
Another (worse) shot of the same angle. Anyway, I ended rerouting the hose along that lip to the side of the tank then back around to the other side, meeting up with the steel fuel line. Which solves that issue completely.
Once I got everything wired up and all the fuel hoses tightened up, it was time to throw the switch and hear that pump purr!
To which I heard absolutely NOTHING.
While I was verifying power to the relay, Jim verified he was not getting any voltage to the pump at all this time. Hmm. Come to think of it, I didn't hear the injectors click when priming either.
PROBLEM: Blown fuse.
Sure enough; blown fuse. probably from the botched first attempt. I replaced the fuse and the thing came to life! 44 PSI, on leaks.
The engine came to life immediately upon cranking. YES!!
For now, I just put some sound deadener over the hole to seal it up; later I'll actually get a hatch I can bolt over everything.
Then I finally drove her home that night and have been playing around since.
Still plenty more to do, but for now, it is time to enjoy the Beast for a bit.


