Thursday, August 6, 2015

Gotta get spark in this relationship


At this point, we are so close to drive-day it is ....driving me crazy.


Okay, dumb joke aside - IT'S CLOSE!  Let's go down a list of things I had to do:


  • Air Cleaner that doesn't get smashed by my hood.
Boom.  Summit Air cleaner to the rescue.  It only has a net height of 2.5" from the carb.  It is so close that I have to use a small nut instead of the typical air cleaner housing nut to clear the hood. 

Unfortunately, I had to take the electric choke off my carb to do this.   I'm still not too clear on how much this is going to affect me.  We shall see.


  • Exhaust - hook up my headers to the rest of my exhaust.  
So originally, I went to Summit and snagged some S-Pipes.  Of course I opened the box when I got all the way back to the shop to see that they are too small. (2" instead of 2.5" diameter)  Damn.

Well, we do have the left over exhaust we cut from the exhaust manifolds.....but I'm not good at cutting or welding.

But guess what, I have kickass friends that know how to weld!!! Jim to the rescue!  

PHOTO MONTAGE


Again, I'm in such a hurry to make Hot August Nights by registration day that I neglect to take pictures after the fact.  I'll remember to do so hopefully really soon. Pretend it looks rad and it works great.  Because it does.

  • Leaky transmission cooler line.
I took a pipe cutter and cut a large section out then put on a rubber hose for a temporary fix.  And by temporary, I mean permanent until something gives.  Or I upgrade something.  Or both.  Whatever, I JUST WANT TO DRIVE THIS THING.

[Pretend there is a fantastic picture of that too]
  • Fuel Pump
"Hey Mike, how is that electric pump going?"

'Going' in my storage box because I don't have enough time to pipe, wire everything. Instead, I will put the stupid Mechanical fuel pump back in.  Lucky for me, I have a Edelbrock 110gph pump that should feed the engine just fine.  

This is, I think, the 5th fuel pump I put in it.  I've battled with some odd issues in the beginning so I bought some cheapo carter pumps which never really fixed the situation.  Also, I swore up and down that one pump was straight up shot.  

Anyway, getting to the two bolts to get that thing to stick is the worst part.    I'm sure Ford made a special "Fuel Pump socket" at the time to fit.  Lucky for me, this 5th time, Mickey decided to show off his "fuel pump bolt placing" abilities and got the things threaded for me before he took off for the night.  Thanks Mickey!

Side Rant: I don't know about you guys but I never had the "right" bolt in front of me.  Looking back, I spend a solid hour of shop time just ******* LOOKING for a correct sized bolt, nut washer, rabbits foot, unicorn, whatever.  I have this "box of stuff" that contains old standard bolts, etc that I go digging through - that actually contained most of the bolts/nuts I've needed fortunately.   This is awful though because it is like a box of Legos;   "How bout this one, no?  This one?  Nope.  This one?  Damn it - almost" You sort, shove, slide your hand through the box, looking for that one, single, odd ball of a piece for ages until you rage quit, only to find it at the top of the pile on the next round through.   My garage I do have a bolt organizer, but I'm at my friend's shop, so I try to take up little space and just have a couple of "carts" full of my stupid junk.


  • Fluids
20/50 Valveoline for the Engine.  Check.
Type-F for both the power steering and transmission. Check.
(I bought about 15 quarts worth of Type-F;  Two O'reillys visited)
A TON of coolant.  Check.

(Insert picture of me over filling the power steering pump and getting it everywhere)

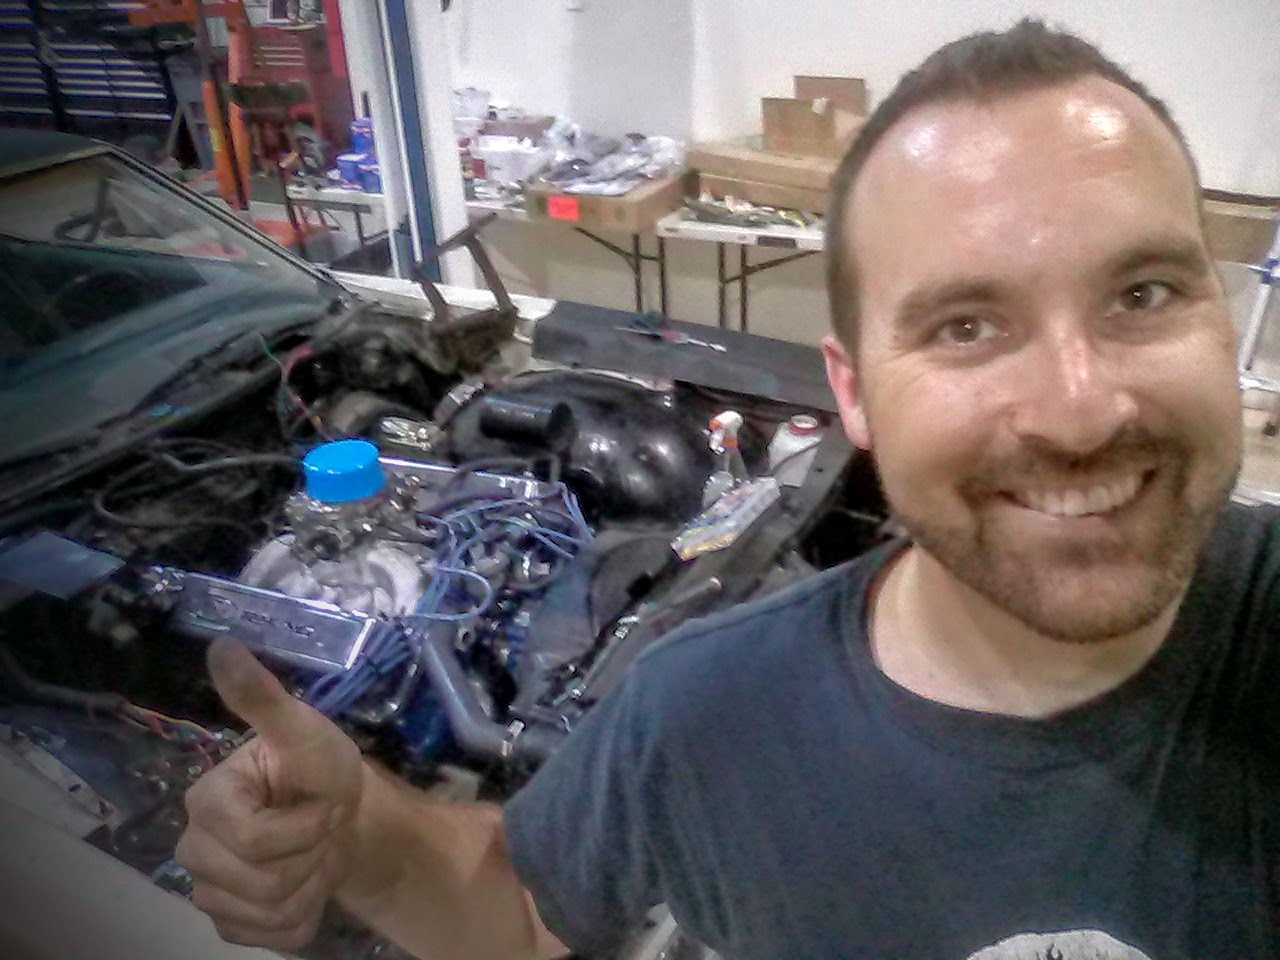
All systems go - proceed with ignition!


Everything should be wired up!   Fuel is connected, all lines are secured.  Let's do this!

*Turns key*

*Engine begins to turn over*

"Sweet! At least I wired the starter right..."

*Engine still turning over...*

"Maybe it needs more gas?"

*Engine STILL TURNING OVER*

"...."


DISAPPOINTED!  
Hmm, nothing.  Also the coil is burning hot too.  Something is wrong.  I double check everything. Even pour gas down the carb, the engine burns that off and just acts like there is zero spark.

So I double check everything.  Fuel was flowing, coil seemes to be outputting spark....but the coil itself was a zillion degrees.    Why? Everything is wired fine.  I checked voltages everywhere - why????

I can't tell you how much this destroyed my spirits.  So, I rested.  The next day....

Welp.  TIME TO THROW MONEY AT IT IN A HURRIED PANIC.  I ditched the old Motorcraft Duraspark ignition box and went to a MSD 6AL box.  With Jacob's assistance, we wired this thing up extremely quickly.  We didn't loom anything, we just zip tied everything together  -  we just want to see this thing come to life!!!


MOMENT OF TRUTH

I turn the key - after a moment or two of turning over -t he engine turns over in glorious fashion.  IT'S ALIVE!!!!  Fuel pressure is nominal at 5-6psi.  Oil pressure around 60, volts about 13-14 and vacuum was around 7-8hg inches.  LET'S GO DRIVE THIS ****.

This thing has power;  it breaks traction if I step on it.  Awesome!!! 

Minor things I immediately noticed:
  • Slight lean patch during 2k-2.5k
  • Accelerator plunger on the carb needs to be tweaked; it will die if I stab it during a standing start.
  • Everything is awesome.
  • It's alive.
  • I'm driving the Beast again after half a year.
  • The new engine I built is running.
  • Wooooooohooooo!


I can't begin to describe how excited I am.   And thanks to my amazing buddies - this was all possible too.  

So I loomed everything up, tapped some holes for the MSD box on the fender and was ready to take the Beast back home!


"Hurr, it's upside down!"  - No it isn't; the rev limiter is easier to read and set from that direction as well as having the harness go the right way.

Tada!  Let's get this thing home!!


Next up:
Register it for Hot August Nights!

Tuesday, August 4, 2015

Transplant Complete

So, obviously, things are going rad.


We last left off on a stupid mistake I made.  But guess what, thanks to my friends; this was a fixable thing.  So armed with a lift, pry bars and Jim's hulk strength, we somehow managed to separate the engine.  Seriously, this was not fun.   I have a feeling an experienced engine builder would magically part the block and tranny like the seas but Jim and I had a hell of a time with it.  But enough about that.  We got it.  

Before:


After:

[Fanfare playing]

And with that, the engine came back together - NEVER TO BE SPLIT AGAIN!  The engine was placed, all bolts tightened and a few beers were consumed in celebration.

I put the air cleaner on just to make it look more complete; ignore the wires...

"Hi Mom"

"It doesn't fit"

So the hood does not clear the stock air cleaner; at all.   Crap.   I don't have the time to drill into the hood at all and probably damage it beyond repair...but Summit does have a selection of air cleaners that sink a bit lower on the carb.  Let's see exactly how much clearance we have!  (Thanks to Mick, we had a few tests to see where I am at with things)


Not much at all.  We tried the same thing with the actual air cleaner housing too; it kisses the hood too much.   So I snagged a Summit brand air cleaner that sits lower on the Carb and only is 2.5" from the top of the carb as opposed to the stock air cleaner which is 2.6/2.75".  

I add this to my shopping list and move on to the next thing.

Leaky Tranny Pan

Got a nice new brand new one at Summit.  The old pan is leaking everywhere.


The stock C6 pan does not have a drain plug.  Mickey gave me the bright idea to just punch a hole through the bottom for an easy drain rather than attempt to unbolt it slowly and leak fluid everywhere.

So I gave the pan a few smacks with the punch and ball ping hammer and boom; drained the thing of fluid.


Once drained, I removed the pan, gasket and the filter.


 Along with my new pan and gasket, I have a replacement filter as well.


I clean the surface of any gunk with some acetone then add some gasket maker to both the pan and tranny surface.  I place the pan on and torque in a opposite sequence and finally torque it about 12 ft-lbs.   Since I've been in an insane hurry, my documentation skills have suffered and I don't have a picture yet.  But trust me, it looks a lot better than the old pan. And no leaks!

So I lay the Beast to rest for another night.  She is almost ready to rumble!


Next episode:
Everything is together but.....WHY ISN'T IT STARTING??

(stay tuned!)

Monday, August 3, 2015

Botched Transplant

This update is straight to business as I have a bit to catch up on.  I have one or two more updates coming soon as I am running a bit behind on ... well, everything!  


Ain't she pretty? 

After the engine was pulled, I took the time to properly put on the brackets, alternator and power steering pump.

I ended up replacing the power steering pump because the other one had odd leaks and I felt like if I had it out, might as well get a brand new one.


Jacob was a good friend and lent me his pulley puller. After a bit of time, I got the old pulley pushed onto the new pump and had it bolted on in no time.

Nothing ever goes according to plan. Ever.  I ran into an issue with belt size here.   This new pump had a neck that stopped it from moving too far down on the bracket.  Which normally you can slide the pump down the bracket to get the belt around it and then tension it up before tightening the bracket bolts.  Not this time...so this means we need a bigger belt!

So the normal 52" belt didn't fit at all.  I shopped around for a slightly bigger one and landed on one at NAPA auto parts.    This was about the 3rd visit as the first two resulted in incorrect belt widths and angles.

Lesson learned:  Verify your belt width, V-Belt angle and of course, size before wasting your time (and money) over at the parts store.

I think I ended up with a slightly longer belt, 53" from O'Reilly Auto Parts.  This came form a 76 Ford F250 with A/C.  It BARELY fit.  With Jim's help, it wrapped onto the pulley like a bike chain.

MOTOR MOUNT MADNESS

This is great.  I could find driver side motor mount brackets EVERYWHERE. Hell, even O'Reilly's had them.  But - NO ONE HAD A PASSENGER SIDE.   Not Summit.  Not NAPA.  Not Rock Auto.  No one except ... Amazon.  Two Day shipping and had one arrive at my door step.  Yet another reason never to leave the house thanks to the big A.

So putting the motor mounts on this time was a lot more simple.  A bit of light, better angles and I had them all in.  But seriously, look at where these four bolts were located: It was almost as if I had to remove the lower control arm.

Not pictured: the flash light being balanced on my neck.


Two bolts right at the bottom there.  Thank you swivel joints.

Tada!  Motor mount brackets installed.  Motor mounts followed.


Prepping the patient

Kevin from Exotic Motors was nice enough to lend us his cherry picker and motor sling.  I slapped the back bell housing plate on and fly wheel.  The engine was ready to rumble.


The Engine clears the car with ease thanks to this big ass lifter.


Hell

I've watched an engine stab once.  It looked awful and a huge pain in the butt.  Now it was my turn. But before we could drop the engine in, Jake noticed we were missing one dowel pin.  The engine normally has two to make aligning with the tranny a cinch.

So first plan was to attempt to take channel locks and a blow torch to the old engine to try to remove one.   This failed absolutely miserably.

Side note:  Jim and I had a show of manhood contest by seeing who can get the tightest grip on the vice grips over the dowel pin.  Jim won this with flying colors.  Not only were my hands not strong enough but my right hand has been developing an almost arthritic pain across the thumb and index finger area.

Either way; we couldn't get the damned dowel out.

So plan B:  Find a bolt that fits and cut the head off.  Bingo.   Jacob was nice enough to grind the head off the bolt and once that was done, made an amazing replacement.

Once we got the engine semi aligned, I had to make sure the flywheel was aligned enough so the torque converter's studs pop through it.  Remember in those last pictures?  There are four nuts that secure the engine's flywheel to the transmission's torque converter....

After shoving, pulling, pushing cursing at the engine, somehow things come together and I BARELY get the stud to poke through the fly wheel.

Yep.  You experienced guys already spotted my fatal mistake.

Let me move on before touching on this.

So here are the motor mount and brackets below:

Here is where the motor mount meets the bracket.  A long bolt slides right through and keeps them in place.

A better shot of the brackets.

Oh not mentioned earlier - after taking the manifolds off, we just cut the ends right off to be able to drop the engine in.  

So here is some AMAZING news:
The headers fit almost perfectly.  The transmission dipstick has to go though. Everything else? Boom.

LESSON LEARNED (before hand thanks to Mickey):  Before securing the engine, see if you have to put your headers on before or after the engine drop.  Fortunately for me, I could do it afterwards.

Boom, the engine is in place!  Right?


Nope.  That last picture of the fly wheel and torque converter?

The Torque Converter's stud is in the WRONG HOLE of the flywheel.  The hole it is in is for the drain plug and will not fully secure the flywheel.  

I want to die.  Not only have I taxed my friends with a horrible engine drop but I managed to align to the wrong holes in the chaos of it all.   

The engine doesn't have to come out - but it has to separate enough to realign the torque convertor and fly wheel.  

TODO:
  • Torque Converter re-align
  • Replace leaky as hell tranny pan and gasket
  • figure out fuel pump situation
  • hook up all tubes and wires
  • hook up ignition
  • find some way to weld exhaust back together
When:
  • In less than two weeks - Hot August Nights.
Difficult:
  • I'm gone the following weekend for a family wedding.
Easy right?  Nothing but time....

Until next time!

Sunday, July 26, 2015

Heart Transplant: Part 1


Lean on me

Working on the car by yourself can be a peaceful experience.   For me, it is a multitude of things:

  • It is an escape from the stresses of life,  a safe zone.    To me, being under the car almost reminds me of when I was a kid and made forts out of blankets and couch cushions.    Except now the fort ceiling is about a foot off the ground and covered in an inch thick concoction of all the fluids my car can possibly leak.
  • A challenge to learn something new; like what possible mathematical magic angle do you need to be at to get that bolt back in  that you just took out?  
  • How to grab that socket/nut/whatever that is laying just out of reach, on the other side of the way your wrist can even bend? And you weren't smart enough to raise the car any higher so you don't have enough room to move your elbows...you attempt to roll but your shoulders are wedged - so you twitch and flail while your wrists are bent at ninety degree angles, slowly pushing that stupid screw/nut/whatever away until you finally rage quit and re-stab yourself back under the car...
  • What was I talking about again?

Oh yeah - ignoring my cynicism,  it is actually pretty fun and peaceful.  But there are times when you just need a friend's help with stuff.  Whether it be for their knowledge, their extra hands, strength or just plain moral support, a friend or friends can be life savers.

Engine swapping is definitely one of those times where you NEED friends.   And I'm super lucky to have a few friends that are not only knowledgable in this area but are willing to help me out.

But let me preface this with a prerequisite of what kind of friend(s) you want around.  If you are new to this, you will want friends that you are comfortable with them seeing you are your worst and/or weakest, whatever that may be for you.   You are going to get pissed off, frustrated, annoyed, disappointed and possibly even physically hurt.  Wait, you WILL get hurt.   And it will probably be your own damn fault.

Okay, on to actual engine work.

Getting ready for the pull

This part is actually straight forward.  I got this done around the 17th so forgive me if I forgot some details.


  1. Got under car.
  2. Unbolted exhaust manifold flanges from the rest of the exhaust pipes.
  3. Got gelatinous ATF goop in hair and on face. 
  4. Got some sort of crud in eye balls.
  5. Didn't grab safety goggles....  WEAR YOUR SAFETY GOGGLES PEOPLE.  
  6. Removed transmission inspection plate
  7. There were four of them
    1. Rotate crank about 90 degrees to remove the next one. 
    2. This will remove the connection from the engine's crank to the transmission's torque convertor.
  8. Removed all but the top two bellhouse bolts - (that is what secures the engine to the transmission).
  9. ENGINE MOUNTS: Since this was my first time attacking this, I didn't really know what the engine mounts looked like.  So for some reason, I didn't think I could get to the single long bolt that held the two mounts together.  So I stupidly opted to disassemble the four bolts that are attached to the frame.  This was a very long, frustrating process as I attempted to navigate a swivel attached to a long extension underneath the control arm and onto an almost invisible bolt head.   (four of them actually)
QUICK RANT:
Safety goggles are amazing but for some reason, my eyeballs turn into mini saunas when I'm under the car and fog the goggles up pretty quickly.  ALSO - each single piece of crud on this engine managed to do a 'Porkin's from Star Wars' by navigating the crevices of my face wrinkles and then dive bombed directly into my eye balls.  At which point I gave up washing my face off and just permanently winked at the dark void that housed these stupid invisible motor mount bolts.   

Anyway, what seemed like an hour later, the mounts were free.  This was after several trips to the sink to wash my eyeballs out.  I was stupid cranky at this point.   

At the time, we didn't have a big enough cherry picker available, so instead, we used the car lift to attempt to yoink the engine out.  This actually worked pretty well - well, it did after I realized I forgot something....


So once we got it secured, we removed what I thought were the last two bolts.  We are shoving, pulling, shaking this engine but it just wasn't giving up. 

I get under the thing and discovered I missed a bolt.  Queue up a few joking/jabbing comments from the crowd above the car.  With frustration building, I fail to find the angle to get to that stupid last bolt.  At that very moment, like a shooting star in the dark,  one last piece of crud from the engine managed to delicately, silently fall onto my eye.  

After throwing a silent temper tantrum, I lay on the floor, defeated.  With that piece of grease or whatever nestling deeper into my eyeball.   I had safety goggles but I probably threw them somewhere by this point....

Boom. They appear in my hand.  Friggin' Jim is on it and rallies me back into action.  That bolt comes out and the crew above me managed to hulk the engine out of the bay.

The Pull


Jake removed the flywheel and plate from the engine.

Yay.


So check out these old exhaust manifolds...


Cracks everywhere.  Also, it looks like someone attempted to repair these manifolds with JB Weld.


Yuck. 


I just wanted to capture how dirty I was but honestly, it felt way worse than I looked.    Anyway, I have more to come - the engine has been stabbed so I'll get that written up ASAP.  


Until then!

Saturday, July 11, 2015

Final Engine Specs

Role Call for the engine:

  • D1VE Block (2-bolt main)
    • .030 over (4.390 bore)
  • D0VE ported heads 
    • 75cc closed chamber
    • 2.08 / 1.65" valves
    • 305/180 cfm @ .600 lift
    • Decked .025" for additional static c/r 
      • (altitude adjustment)
    • guide plates, manganese bronze guide, p/c viton guide seals
    • PRW 1.73 ratio steel body rocker arms
  • Trick Flow Chromoly Pushrods
    • 8.8" intake, 8.9" exhaust
  • Voodoo cam 
    • 213/219 / 110 +4 cam and hydraulic lifters
  • Stock 460 crank
    • polished/honed
    • 3.85" Stroke
  • Stock rods
    • #C9AE 6210-B
  • KB Hypereutectic Dished Pistons
  • Duraspark II Distributor and Ignition module
  • Edelbrock Performer RPM intake
  • 1411 Edelbrock Carburetor  
    • 750 cfm
    • Jetted for altitude
  • Stock replacement water pump
  • Standard flow oil pump
  • Stock replacement oil pan
  • ARP bolts and studs
  • Fel-Pro gaskets

Dyno Results:

  • Torque: 524 @ 3500 
  • Horsepower: 436 @ 4900
Video of it running: Dyno Run

More specs (click for large):