Sunday, May 10, 2015

Baby steps. Also t-rex arms. (and a wedding pic)

Engines are hard.

Last time on Mike's engine build: (scary announcer voice)
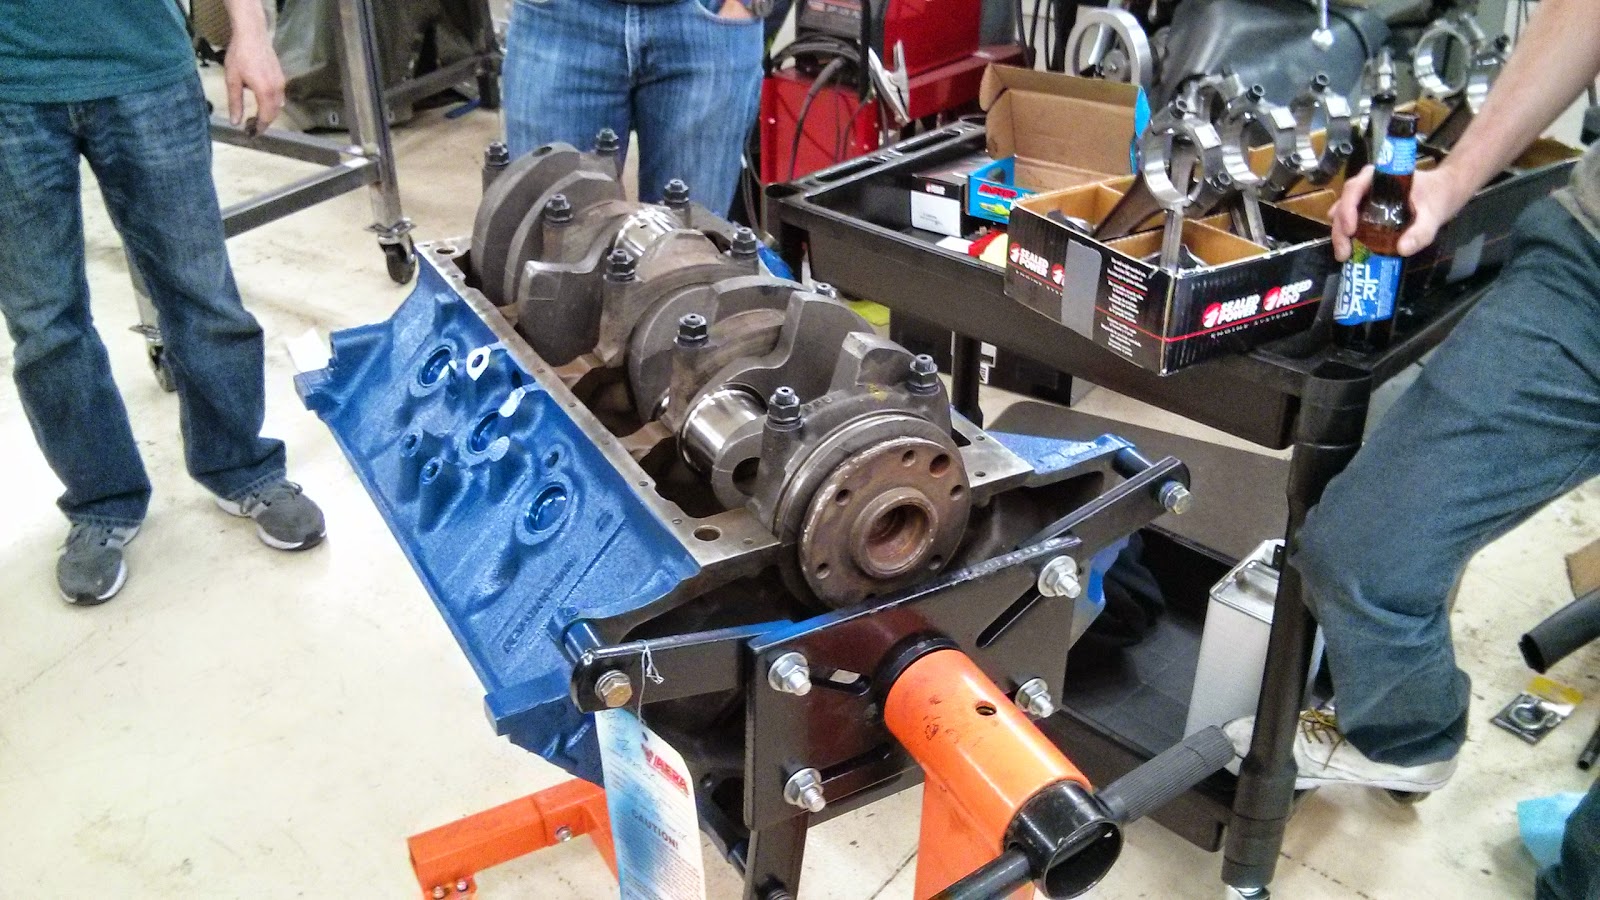
When we last left off, our ultra novice engine builder forgot to chase the used crankshaft's threads and regretfully, fused the crankbolt into the crankshaft. Upon impacting the bolt out, 1/4 of the threads came with it.

But guess what, I just grabbed a 5/8-18 tap and chased those threads! BAM  I still got at least 1-1/4 good threads left and damn it, I'm using them.  By the way, here is what the ARP bolt looked like after we got that stupid thing out:


Also, next time I do this, I'm getting a friggin crank-snout SOCKET to use instead of using the bolt.

Anyway, moving head....slowly. Baby steps people.

Timing Cover and Water Pump


New cover on the left, old cover on the right.

I took the dipstick tube from the old one and hammered that into the new one.  So the engine rebuild book told me to use sealer on each surface before putting on the gaskets to ensure no leaks would happen.

So I did that.  Poorly.  I owe Jim(my boss, friend and man-cave owner) a whole new tube of rtv sealer.  Not only did I over-apply it poorly but too much of it.  Yes, I know that will clog all my water tubes.  So I did my best to clean up any excess before it cured.

OH. Also, I didn't check before hand but these 429/460 timing covers have a "back plate" that the water pump rests on.  I also didn't have any bolt hardware for this.  After two trips to Summit Racing, I was finally golden.


Once you apply sealer to all the surfaces, put the water pump on the timing cover, then put the timing cover on the block...hopefully you are done and don't have any missing parts.

Then, the oil pan and gaskets.  They are cork gaskets - so that means you tighten all the bolts progressively, one by one, several times.  Because after you tighten them once, the cork rests and then you have to re-tighten everything again.  Rinse and repeat FOREVER until they remain firm. Then you are finally allowed to torque them down. Why so little and so long?  Because if you over tighten too soon, the pan rests incorrectly and leaks will occur.

Anyway, fast forward:


Things I've done wrong in the last two updates:

  1. Didn't chase ALL the threads - just some.  (Because the one bolt you will have trouble with will be the one you didn't chase first.)
  2. Put the second woodruff key in before I put the sleeve on the crankshaft.
  3. Didn't verify I had all bolts before proceeding.
  4. Probably over torqued one of the oil pan bolts.
  5. Hammered the crankshaft oil seal in with too small of a cylinder, then hammering it in crooked at first.  (get the RIGHT TOOL FIRST)
  6. Being impatient.
But hey, it looks good...so far....right?  

Next up:  Heads; PUSH RODS - measuring, geometry to the rockers, yelling.


BUT WAIT - THERE IS MORE

I put that new steering column in!


That's the thing that connects the column to the steering box.  The coupler or 'rag joint'.


And above, there you see my steering box, naked, with it's shaft sticking out.   Let's fix that, shall we?


A nice solid connection to the steering box.   Now let's put that original steering wheel on!


Yes. Much better. Yes, I have mismatching trim - that trim was actually missing before - I yoinked that from another LTD of another color.  I'll either dye it later on or just replace it if I find matching trim.

Anyway, let's do before/after.

Before:  Look at all that exposed column/wiring, etc.  Ugh. (btw, those old gauges are mechanical gauges, with actual engine oil being pumped to the gauge pod. Yeah, I replaced those.)

Bad picture below but look at that exposed column and trim below the steering wheel!!

Ugh.

But....(again),


Much better.  No more exposed column, no wires sticking out, original steering wheel (minus a the center badge but I'll find one soon).

So now, I'm in the process of removing that stupid floor shifter.

Pros - I have MOST of what I need to do it.
Cons: I need to go to home depot for a make-shift bracket to hold the shifter linkage in place under the car.

Also, putting plastic grommets in holes are a nightmare when you're reduced to T-Rex arms underneath the car.  Hell, doing ANYTHING under a car is a nightmare.

I've dropped these things on my face today while under the car:

  1. The plastic grommet I was attempting to press into a bracket.
  2. A socket.
  3. The wrench that the socket was attached too moments later.
  4. Dirt.
  5. The plastic grommet again.
  6. The socket again.
It was a fun day. Until next time....more engine stuff hopefully.

PS - I GOT MARRIED!


Sunday, May 3, 2015

Update on hold...

Because I got married this weekend.  So.....yeah.  Although, I did get that new steering column/wheel in this Sunday.

So there is that.  Pics and such to come.

See ya soon!

Sunday, April 26, 2015

That really turns my crank.

STUPID PUN ALERT

It's about a crankshaft.  Get it?      

Get it? Hilarious.


Anyway...two parter again; engine stuff then car stuff.

ENGINE PROGRESS UPDATE ALERT TIME!!!

Last time, I had to make sure the piston rings for my KB-138 pistons were properly gapped.  Now that was done, it is time to put those puppies in the engine block.


This took a bit since I'm slow and clumsy.  You have to use this ring compressor thing to compress the rings and keep your piston from scrapping up the sides of the cylinder as well as banging up the crank down below.

Check out the pictures below for a better idea.


Pictured above: Jacob doing the first cylinder for me.  Not pictured, me taking double the time to do the last seven cylinders.

Pictured above: First three pistons in place and locked onto the crankshaft.

Lookin' good!

Coming along!  All pistons are in place now.


Then, after they are all on there, gotta check the gap between the pistons and crankshaft journal walls. You have to make sure there are within a specific clearance.


Above: Me measure the gap from the middle instead of from the sides.  Oh well, you get the point.

OH NO - After measuring the gaps, all of them were above the stock's allowable "side clearance"!!


After sulking the rest of the day, I hit up the 460ford.com forums for some advice.  All the major race engine builders there told me that not only was the clearance I was getting allowable for my type of build but they wouldn't go any less for above-stock builds.

Crisis #2 averted.  (#1 was dropping the crankshaft...)

On to the camshaft.  Got that thing gooped up completely so it is ready for it's first run.

Got the engine heads and water pump painted.


And finally, Jacob and I got the timing set int place.  (Cloyes set)


ROADBLOCK - Officially crisis #3.

So all was going well....See that bolt in the crankshaft there?  Yeah, well that didn't come out so easily.  In fact, it didn't come out.  Not with the strength of two men.  After an immense amount of work - the bolt came out....along with 1/4" of crankshaft threading.


I don't know what to do now.  I'm going to call Aims Machine shop tomorrow for some advice.  Also, some folks also suggested that if crankshaft has enough threading, to just get a longer grade-8 bolt.  Or tap a larger bolt in there....Worst case scenario is that I have to take the crankshaft back out and possibly get a new one.  Best case scenario: I just grab another bolt.

So that's that.  Let's get back to actual car stuff now.

STEERING COLUMN FUN

So last time, I was going to replace the old steering column with this new steering column I got from some dude on the east coast.  I was going to do this because the old steering column was wrecked up and the ignition module's "coil"/"on" wire was fried.


I pulled the column finally and checked out that ignition wire...


Yeah, it was done.  Oh well, good riddance.

RESEARCH NEEDED:

I tested the new module out and it works great.    But in my ignorance, I just now realized a huge difference between the columns.


Ugh.  I should have realized.  Since my original column is a tilt-shift column and the other one is a no-tilt - the connection to the steering box is a bit different.    In the picture above, the one on the left, my original one, has a 'D' like shaft-connection.  The one of the right has this plate like thing...

My old one hooks into this thing called a flex coupling. On both sides, it has the ridged clamp that accepts a shaft like connection.   The shaft would push right in the center clamp of that.


I imagine the new column shaft end (with that plate like fitting at the end) would attach to the bottom end of that coupling and bolt on.   So I imagine I need to order one like the one above (like this one?)

So yeah.  That's what I'm going to do. Woo.

So there you have it.  Fun stuff.

Until next time (and after more money is tossed at this)!

Monday, April 20, 2015

No update yet - saving update for next Sunday.

So instead, here is a picture of my stupid cat right after he woke me up the other morning.

"Feed me"


Sunday, April 12, 2015

Crankshaft goes in / Steering Column Fun

I missed an update last week. 

Well, truth is, not much really went on.  Easter hit, I also had a bunch of other things I had to take care of.  Most importantly of all, my friend who is in charge of making sure I don't do anything stupid was gone, so I wasn't about to risk burning the shop down without him.

Anyway, this week was a bit better.   Time to get the crankshaft in there.


There it is, all painted up and ready to rumble.  I cleaned up everything yet again with some acetone and then we got the ARP studs in place.


Jake put the oil retainer end seal on first.

Then after the studs were put in, we lubed up the studs as well as the bearings.

Then we put the caps on and tightened it all down.


Then we got the big torque wrench out and tightened the end cap studs to spec.


Then we took a beer break and practiced some lassoing.   Don't ask.


Next up, Picton rings! 4
...and I forgot to take any pictures while we were putting the piston rings on.  So here here is the only pic I got of that day before it became a blur.

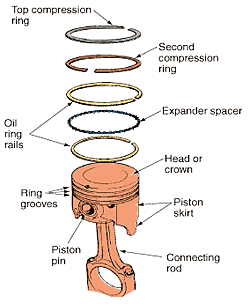
So some piston ring sets have to be properly gapped using a grinder.   Basically before I put the rings on the piston, I have to make sure they are a specific gap (which can be found on your piston's spec sheet) to allow for proper expansion but not to much otherwise you'll risk losing compression and having gasses blow back into the crank.  If they are not gapped, I have to place them in the bore, measure the gap, take it out and grind it a bit, deburr the edges, place them back in the cylinder bore and measure the gap.  Rinse and repeat until it is properly gapped.

Anyway, check the picture below to get a good idea.


Anyway, all 8 pistons got em now so next time I'll be assembling the pistons on the actual crank.  Then things are really are going to move.

Steering Column Fun

A bit ago, I snagged a column from some dude on the East Coast.   Mainly because he hooked me up with all the original column shift linkage and it seemed to be a lot better condition than my current on;  My current column is a mess and the ignition harness is basically shot.   I got this for a project down the road but something came up and I gotta get this thing in now instead of later.   


Reason is I want to put an electric fuel pump in, but I don't want to do that until I can figure out why my ignition harness in the engine compartment side isn't getting any power to the (i)Ignition wire.  

Why do I need that all done?  Because I have an electric fuel pump controller that will detect when the RPMs hit a low threshold and automatically shut the pump off.  So if I roll the car, my fuel pump won't continue to pump death all over me.  

That controller and pump will be powered by when the key is in the 'ON' position.   And currently, my coil (and the rest of the car that needs that) doesn't know when the key is in the on position.

How is my coil currently being powered?  By the accessory key-on.  *nods*  Yep.  I'll get into that later but long story short, I removed all the old fire starting wiring jobs from the previous owner and ran my own fused circuit/relay powered by the battery and keyed-on by the accessory post.  
Acc Post of doom.  That yellow wire goes through the fire wall and will tell my relay when to give precious life to the rest of my ignition controlled car.

I would actually like the coil to be powered by the (I)-wire, controlled by my keyed ignition.

Check this diagram out:

I had to check that I had continuity when the key is in the on position.  So I had to reach under my dash of wiring doom to verify that the ignition harness was at least doing that....

I took the multi-meter and gave it a test.  Nothing. Dead in the water.   So that explains why the previous owner had it wired this way.  Ugh.  Well....might as well pull the column out and pull the ignition harness out of the column for more testing.....hell, while I'm at it, let's look at putting the other column in!


So in the new column, the circled stuff is my ignition switch and harness.  I gotta test those guys out before putting the new column back in. If both columns are bad, I gotta snag a new one.

But FIRST, I have to take the damn thing out.  Which is fairly simple but I didn't actually complete today.    The last bolt I needed to take out (sleeve to flex thingy or whatever) is a 12-point and not hex.  Which I have no tools for.  


This week I will snag the proper tools and hopefully get this done.  Then after that, I can install the new fuel pump too - which may be some work because I'll probably bend some new line to replace the old stuff.  As usual, I will post any major progress and keep it picture busy.

Until next time!